Here’s how:
- Share Your iPhone or iPad’s WiFi Configuration.
- To connect your HomePod to a WiFi network automatically, use a configuration profile.
- Look Up Your MAC Address.
When it comes to building its technology ecosystem, Apple has always been one step ahead of its rivals. A prime example of how Apple continues to develop cutting-edge technology while maintaining its monopoly in the tech industry is the HomePod. One of Apple’s more recent inventions lets users use a cloud-connected device to enjoy soundtracks and voice assistance.
Table of Contents
What is the HomePod?
Apple HomePod makes it incredibly easy for Apple users to control the device and play music over a Wi-Fi network. It is a smart speaker that can be used with iOS 8 or later-equipped phones, tablets, Apple Watches, and other devices.
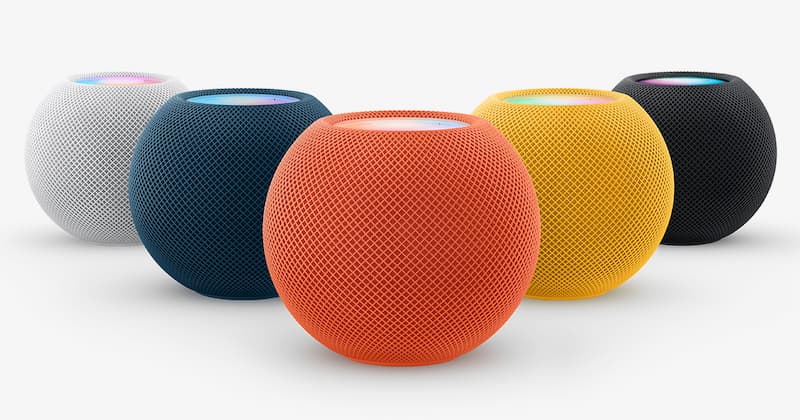
With the HomePod Mini speaker, it is now simpler to enjoy Apple Music and other services.
The HomePod Mini has a high microphone sensitivity, a sleek design, and 360-degree sound. Despite some criticisms for its difficult complete pairing process, the HomePod Mini has a lot going for it.
Additionally, keep in mind that Android devices are not supported by the HomePod. The HomePod is quite picky and only supports Apple products, in contrast to Google’s Home Max, which could connect any device via Wi-Fi. It initially only functioned with Apple Music. However, Spotify is now also compatible with it.
Connect Your HomePod to WiFi Networks
You can connect your HomePod to WiFi networks that don’t require a one-time password and use the below-mentioned authentication types:
- PEAP
- EAP-TLS
- EAP-TTLS
- EAP-FAST
Depending on your requirements, you can install a configuration profile to automatically connect or choose to share the WiFi configuration from your iPhone/iPad to your HomePod.
Share the WiFi Configuration from Your IPhone Or IPad
- On your iPhone or iPad, connect to the WiFi networkand then launch the Home app.
- Long-press the HomePod tile at this point. You must first tap Speakers, then touch and hold each individual HomePod for stereo-paired HomePod speakers.
- Next, scroll down and hit “Move HomePod to [network name]”. Once your HomePod has successfully connected to the new network, make sure to tap Done.
Use a Configuration Profile to Automatically Connect Your HomePod to a WiFi Network
Apple also gives you the option to set up a configuration profile that connects HomePod to a WiFi network automatically. You can make a profile accessible from a website or email message as a network administrator.
- Simply, tap the profileon your iPhone or iPad and then select your HomePod.
- If your HomePod doesn’t appear, choose Other Devicesand then select your HomePod. The installation can then be finished by following the instructions.
Find Your MAC Address
Your network administrator might occasionally need your HomePod’s WiFi address in order to grant access. Access to your MAC address is made simple by the iOS Home app.
- Your iPhone should now be Home-enabled. The HomePod icon can be touched and held. Your WiFi address (MAC address) is at the bottom of the page, so scroll down to find it.

Tips for Changing Wi-Fi Networks on HomePod
- On your iPhone or iPad, open the Home
- The HomePod icon for the specific HomePod that’s giving you trouble should be tapped and held or 3D Touched.
- At the top a message will appear that says “This iPhone and this HomePod are connected to different Wi-Fi networks. Move HomePod to ‘(Wi-Fi name)'”.
- HomePod will instantly join the new Wi-Fi network after a short while.
Keep in mind that this only functions if your HomePod is having trouble logging onto a Wi-Fi network. HomePod can only be factory reset in order to change the Wi-Fi network, which is unfortunate.
Tips for Viewing Your HomePod’s Network Information
Your HomePod’s MAC address will be required by the network administrator to grant access to your device. You can find the MAC address of your HomePod in the Home app on your iPhone or iPad: Press and hold a HomePod in the app, then tap Settings in the pop-up card. Your Wi-Fi address will be listed at the bottom as you scroll down.
In order to switch between viewing the HomePod network identifier and the name of the Wi-Fi network your smart speaker is currently connected to, simply touch the Wi-Fi Address label.
How WiFi Work on HomePod Mini Or HomePod
Your smart speaker will automatically connect to the same WiFi network that your iOS/iPadOS device is currently using when you set up your HomePod mini or HomePod using your iPhone or iPad. This automatic use of the same WiFi makes sense given that the HomePod and the iPhone must both be connected to the same network for seamless operation. Additionally, it means you won’t need to worry about manually changing the WiFi network on your HomePod.
But what if your iPhone later decides to connect to a different WiFi network? Since the HomePod doesn’t automatically change the WiFi network in this situation, you will have to do it manually.
Nearly all 802.1X WiFi networks support HomePod connections. After the release of iOS 15.4/iPadOS 15.4 or later, HomePod can also be connected to captive networks, such as those provided by hotels or dorms, which demand additional sign-in procedures. You can also install a configuration profile to connect if your 802.1X WiFi network requires a unique identity certificate for every device.
Final Words
Apple HomePod is a great innovation and value addition to Apple’s ecosystem, whether it’s for listening to Apple music or using Siri to carry out arbitrary tasks. More importantly, it’s fairly simple to use, so you plug HomePod in and set it up initially. It won’t take long for it to be prepared.
It serves as a small command center that gives you control over your home appliances. What’s more, it can connect through any Apple device. Your Homepod will perform its function with just a “Hey Siri” command. It should be simpler to use this device at home or a friend’s party now that you know how to connect it to Wi-Fi.
Read about How To Change Siri’s Language On iPhone, iPad, And Mac?